通过前面的阅读我们已经能拿到了所有的容器启动参数。那么我们可以思考下。我们自己的 单测类其实并没有交给容器来管理,那么我们的单测类中的属性都是什么时候注入的呢?
答案就在 TestExecutionListener
java
public interface TestExecutionListener {

	default void beforeTestClass(TestContext testContext) throws Exception {
	}

	default void prepareTestInstance(TestContext testContext) throws Exception {
	}

	default void beforeTestMethod(TestContext testContext) throws Exception {
	}

	default void beforeTestExecution(TestContext testContext) throws Exception {
	}

	default void afterTestExecution(TestContext testContext) throws Exception {
	}

	default void afterTestMethod(TestContext testContext) throws Exception {
	}

	default void afterTestClass(TestContext testContext) throws Exception {
	}

}
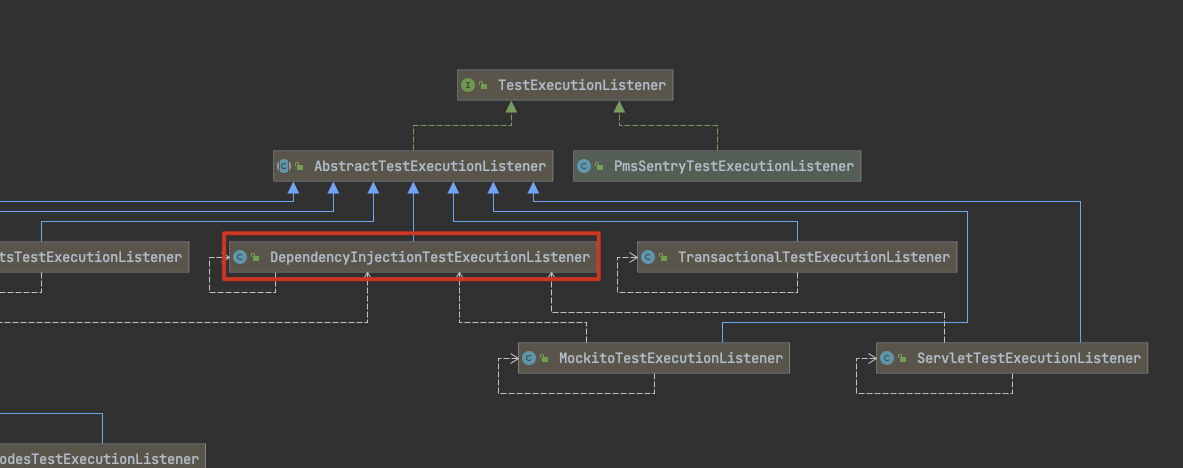
通过名字我们发现了貌似一个可以进行依赖注入的类。没错就是在这里,在单侧方法执行前。通过
java
public class DependencyInjectionTestExecutionListener extends AbstractTestExecutionListener {
	@Override
	public void beforeTestMethod(TestContext testContext) throws Exception {
		if (Boolean.TRUE.equals(testContext.getAttribute(REINJECT_DEPENDENCIES_ATTRIBUTE))) {
			if (logger.isDebugEnabled()) {
				logger.debug("Reinjecting dependencies for test context [" + testContext + "].");
			}
			injectDependencies(testContext);
		}
	}

	protected void injectDependencies(TestContext testContext) throws Exception {
		Object bean = testContext.getTestInstance();
		Class<?> clazz = testContext.getTestClass();
		AutowireCapableBeanFactory beanFactory = testContext.getApplicationContext().getAutowireCapableBeanFactory();
		beanFactory.autowireBeanProperties(bean, AutowireCapableBeanFactory.AUTOWIRE_NO, false);
		beanFactory.initializeBean(bean, clazz.getName() + AutowireCapableBeanFactory.ORIGINAL_INSTANCE_SUFFIX);
		testContext.removeAttribute(REINJECT_DEPENDENCIES_ATTRIBUTE);
	}
}
想法或问题?在 GitHub Issue 下方参与讨论
去评论